Page 2 of 8 ... January 1998 - January 2000
January 1998 -- At the Body Shop
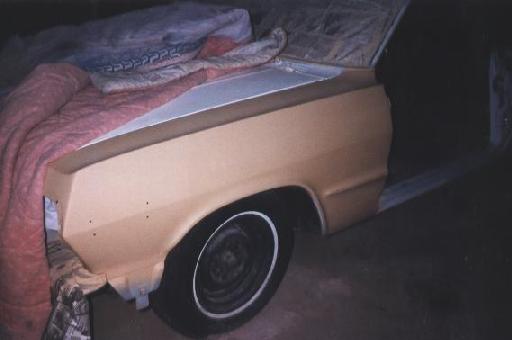
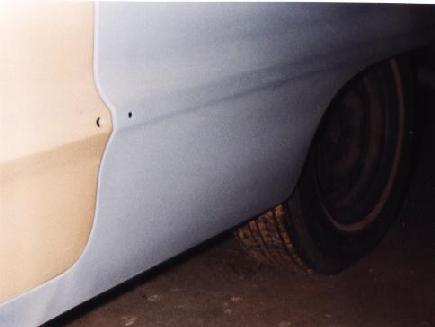
These photos were taken at the body shop. The front fender has been stripped and etch primed. The door is off to have some rust cut out and a lower patch panel welded in place. The hood also had quite a bit of rust along the front edge so we ended up replacing that with a better one off a parts car.
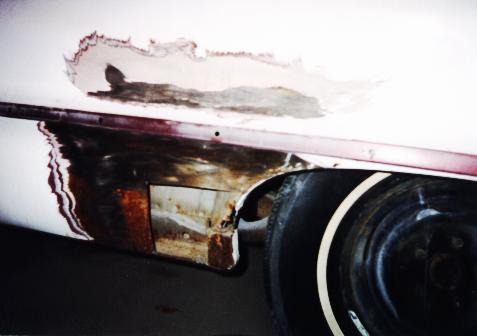
There was a fair amount of rust on the driver side quarter panel. The passenger side wasn't as bad, but both sides were cut out and replaced with patch panels from the wheel opening forward. This photo also shows the several layers of paint that were on the car.
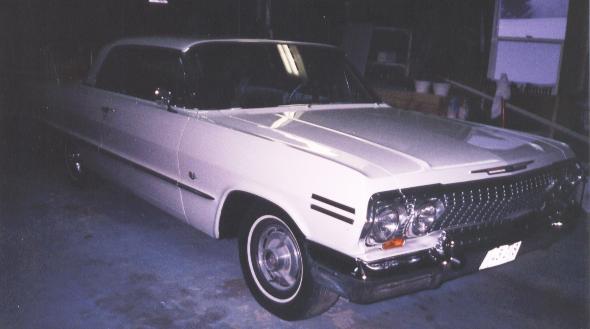
November 1999 -- Fresh Paint
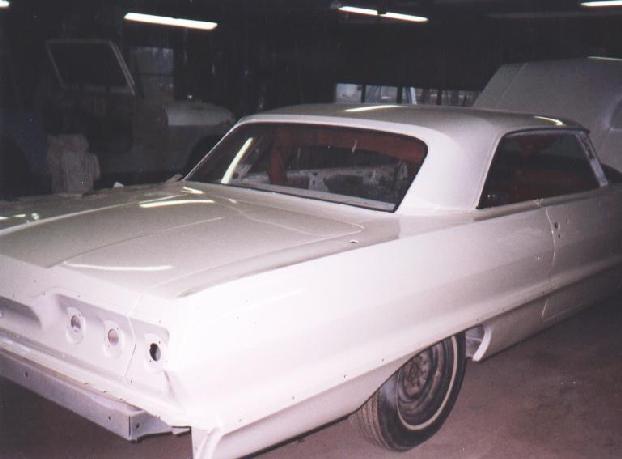
The Impala was painted with Dupont ChromaBase/Clear in its original color of Ermine White.
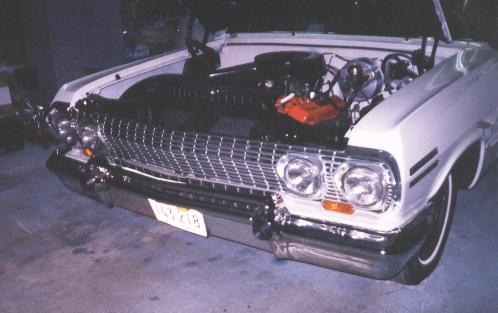
December 1999 -- Re-Assembly
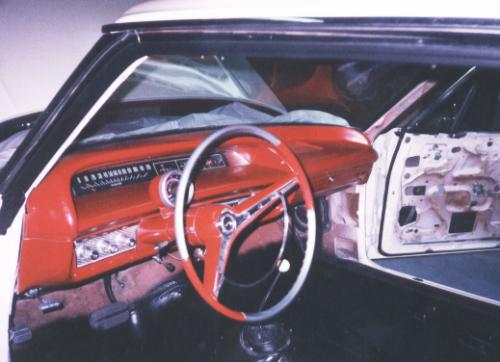
About a week after the car came back from the body shop, we started putting it back together.
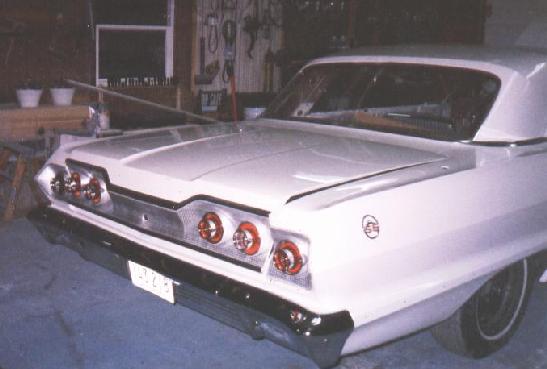
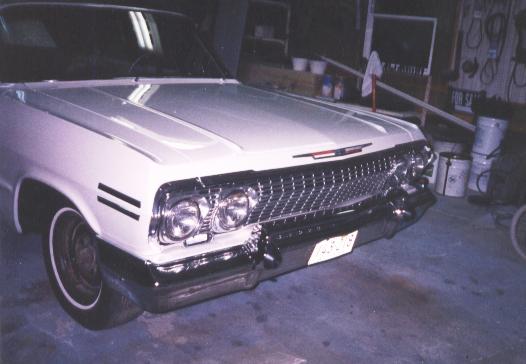
We used re-chromed bumpers from Bumper Boyz, a nice used grille, and NOS hood lip molding and fender trim to complete the front end. The hood emblem, fender emblems, and fender spears are all excellent reproductions from Trim Parts.
Update: I have read mixed reviews about the quality of Bumper Boyz re-chroming. Evidently, we got lucky because the bumpers we received were quite nice looking and have held up very good over the years (this update written in 2014). Our only complaint is with one of the cores they supplied/used ... the inside had some rather heavy rust pitting damage. But that part isn't very visible once installed.
We also converted the car to power brakes by adding a good used factory brake booster.
The original body side moldings were in rough shape with lots of dings, scratches, and damage to the "engine turned" aluminum inserts. So Dad purchased a complete set of reproduction 63 SS side molding from Impala Bob's. Update: From what I've read, Impala Bob's is no longer in business. However, there are probably only one or two actual manufacturers of these reproduction side moldings so unless things have changed over the years, the following info likely still applies regardless of the supplier. This set included:
- Front fender moldings. These pieces are good quality reproductions but they do not include the retaining brackets (metal strips with 3 studs) so we had to re-use those off the old pieces. These moldings came with white painted centers (correct for Impala) and the "engine turned" aluminum SS inserts were included but not pre-installed. I found that 3M Plastic and Emblem Adhesive 08061 worked well for attaching the inserts. However, I probably should have used some lacquer thinner to remove the white accent paint off the moldings first since you can still see a tiny bit of it along the edge of the inserts.
- Door moldings. These are excellent high quality reproductions that come with all of the correct mounting hardware. That consists of plastic inserts & screws for the ends along with metal push-in spring clips for the center -- exactly like the originals. And these door moldings already had the "engine turned" SS inserts pre-installed.
- Quarter panel moldings. These pieces are okay quality reproductions that leave a bit to be desired. They came with generic (non-original looking) mounting hardware so for an original appearance where some of the fasteners are visible from inside the trunk, we also purchased an exact reproduction hardware kit from another vendor (Late Great Chevys if I remember correctly).
- Like the front fender molding, the quarter panel pieces came supplied with the Impala style white center accents and aluminum SS inserts that had to be glued in with the 3M adhesive. The "IMPALA" lettering included with the moldings were high quality reproductions made by Trim Parts. However, the added thickness of the "engine turned" SS aluminum inserts made some of the studs on some of the letters too short to peen the ends to secure them in place. So we used a little bit of the 3M emblem adhesive on those letters.
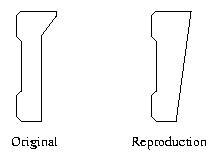 The biggest issue with the quarter panel moldings was with them not properly fitting the contour / profile of the car's
body. A quick comparison between the original and reproduction moldings revealed that the originals have a "V-shaped" contour
on the back side to fit the car while the reproductions were basically flat. Re-creating that "V-shaped" contour on the back
of the reproduction moldings took some careful trimming of the ends and slight re-bending of the flanges along the back. To
the right is a sketch that illustrates the profile of the original moldings compared to the reproductions.
The biggest issue with the quarter panel moldings was with them not properly fitting the contour / profile of the car's
body. A quick comparison between the original and reproduction moldings revealed that the originals have a "V-shaped" contour
on the back side to fit the car while the reproductions were basically flat. Re-creating that "V-shaped" contour on the back
of the reproduction moldings took some careful trimming of the ends and slight re-bending of the flanges along the back. To
the right is a sketch that illustrates the profile of the original moldings compared to the reproductions.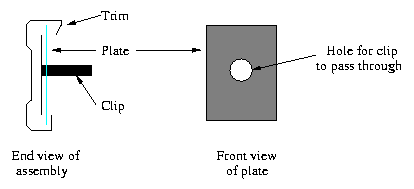 Another issue with the quarter moldings was the width of the flanges along the back edge that the mounting clips hook
into. The flanges on the reproduction moldings are narrower than the originals and not quite wide enough to hold the original
(or OE style reproduction) clips in some areas. To fix this, I cut some rectangular plates of sheetmetal, drilled holes in
their centers, and slipped them over the clips. These plates effectively serve as extensions to widen the grip range of the
clips and allow them to fit securely behind the narrower flanges on the reproduction moldings. These plates are hidden behind
the moldings and are not visible once installed on the car. To the right is a sketch (not to dimension) that illustrates the
construction and placement of these plates.
Another issue with the quarter moldings was the width of the flanges along the back edge that the mounting clips hook
into. The flanges on the reproduction moldings are narrower than the originals and not quite wide enough to hold the original
(or OE style reproduction) clips in some areas. To fix this, I cut some rectangular plates of sheetmetal, drilled holes in
their centers, and slipped them over the clips. These plates effectively serve as extensions to widen the grip range of the
clips and allow them to fit securely behind the narrower flanges on the reproduction moldings. These plates are hidden behind
the moldings and are not visible once installed on the car. To the right is a sketch (not to dimension) that illustrates the
construction and placement of these plates.
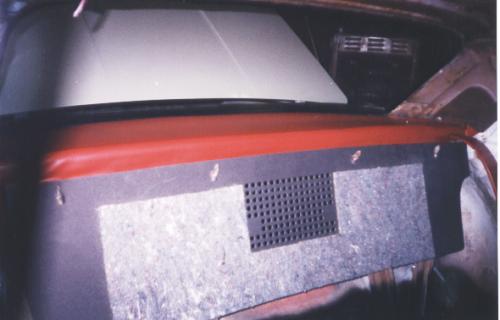
Next, we installed new door and roof rail weatherstripping. We also put in some of the new interior parts (package tray and dash pad) before taking the car to Bartman's Upholstery for the rest of the interior work.
- Continue on to Page 3 (January 2000 - August 2004 ... Interior and After Photos)
- Skip to Page 4 (August 2004 - April 2007 ... 409 Engine Rebuild)
- Skip to Page 5 (October 2007 - February 2012 ... Suspension Rebuild and Engine Compartment Detailing)
- Skip to Page 6 (February - August 2012 ... 409 Engine Install and Start Up)
- Skip to Page 7 (September 2012 - September 2015 ... More Detailing and Miscellaneous Projects)
- Skip to Page 8 (October 2015 - present ... A Few More Updates)
- Return to Dad's 63 Impala Page
- Return to Ray's Chevy Restoration Site Home Page
- © 1998 - 2023 Raymond McAvoy. All Rights Reserved.