Page 5 of 8 ... October 2007 - February 2012
October - November 2007 -- Engine Swap Preparation Begins
We brought the 63 into the garage and started removing parts in preparation to pull the 327. While the engine is out we'll be taking the opportunity to clean and re-detail the engine compartment.
December 2007 -- Front-end Rebuild
We decided to install the new front springs before pulling the 327 since the weight of the engine in the car eliminates the need for a spring compressor. The spring swap ended up turning into a complete front-end rebuild. We replaced the a-arm bushings, ball joints, tie rod ends, brake cylinders, brake shoes, and other parts that were either starting to show some wear again or were not done during the initial restoration work we did back in the late 90's.
January - February 2008 -- Rear Suspension / Axle Rebuild
After rebuilding the front-end, we decided to give the rear axle and suspension a complete overhaul as well. Aside from replacing the body mount bushings we hadn't done much restoration work on this area of the car in the past. So there was lots of cleaning, painting, and detailing to be done.
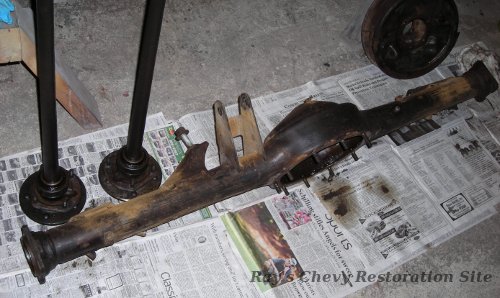

In the process we discovered a factory "P-case" Positraction rearend hiding under all the gunk. All the internals (gears, bearings, etc.) were still in good condition so after a good cleaning, we put it back together with new gaskets and seals, and I gave the whole thing a coat of semi-gloss black paint.
March - April 2008 -- Work on the Rear Continues
Like the front-end, the rear also received new control arm bushings, brake cylinders, and brake shoes. The car's original 45 year old steel brake lines were still in above average condition for their age, but to be on the safe side we decided to replace them all. I carefully removed the old lines and used them as templates to bend new ones from SAE J1650 Copper Nickel Ferrous alloy tubing. This tubing doesn't rust and it's really easy to bend and double flare. I sprayed the new lines with a light coat of silver paint to make them look a bit more like the original tin plated steel lines.
May 2008 -- Removing the 327 and Re-Detailing the Engine Compartment
We pulled the 327 and started cleaning the engine compartment. The seam sealer we used on the firewall back in 1997 evidently wasn't the right stuff since it was still quite soft and had allowed the paint to crack and peel. The spray can lacquer primer I used back then wasn't the best choice either. So it looks like the firewall will be getting stripped down for another repaint.
June 2008 - November 2008 -- On Hold Again
The 63 project is on hold for the summer while we work on some other projects.
December 2008 - May 2009 -- Tilt Steering Column and Tachometer
This winter, I cleaned/restored/detailed quite a few parts that we had removed from the firewall and engine compartment.
As a side project to the 409 swap, we're also swapping in a factory tilt steering column that dad picked up a while ago. The column was in pretty decent mechanical condition (just needed a new lower bearing and turn signal switch cable). We got those parts (along with some new chrome tilt/turn levers) from Jody Anderson's Southside Automotive.
The aftermarket tachometer that had been in the car was screwed to the old steering column. We took that out and replaced it with a new reproduction in-dash factory-style tachometer.
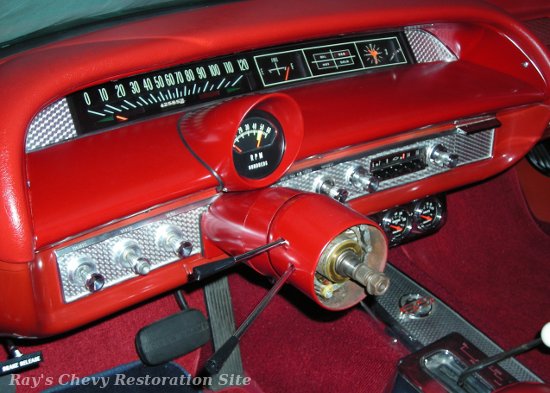
I've seen photos of some 63/64 tilt columns with a hole cut in the outer jacket for tachometer clearance. However, I managed to get this one to fit without any cutting. I simply added a couple of shims between the dash and steering column support as shown in the factory assembly manual (Sect. U16, Sheet 2.00) and used a Dremel tool to shave a tiny amount off the bottom of the reproduction tach housing.
The steering wheel still needs to be freshened up with a new coat of paint. Years ago, I had painted it two-tone red/silver. But after reading a steering wheel ID/tech article in one of dad's old Late Great Chevy magazines, I learned that the two-tone scheme wasn't used on the steering wheels in cars with red, black, or saddle interiors.
Also shown in the above photo is a new set of AutoMeter "Traditional Chrome" gauges (oil pressure, water temp, and voltmeter) mounted on a chrome panel under the dash. These will get hooked up to the 409 once it's installed.
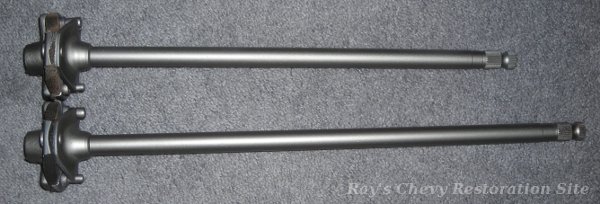
Finally, here is a photo showing the difference between the tilt (top) versus regular (bottom) lower intermediate shafts. The shaft used with the factory tilt columns is a couple inches shorter due to the design of the upper coupler (not shown).
June 2009 - November 2009 -- On Hold Again
The 63 project is on hold again while we take care of some other projects.
December 2009 - March 2010 -- Re-Painting the Firewall
As mentioned above, the previous paint job we had done on the firewall back in 1997 was starting to have some issues due to the seam sealer & primer. So getting back to work on the Impala, I sanded the firewall back down to bare metal for a redo.
This time around, I used 3M Fast-N-Firm seam sealer, Nason Ful-Poxy epoxy primer, and top coated it with Nason Ful-Thane singe stage urethane paint.
April 2010 - November 2011 -- On Hold Again
I was busy doing some extensive rust repair work on my daily driver and giving it a new paint job so we didn't get much done on the Impala.
December 2011 - January 2012 -- More Engine Compartment Detailing
This winter, I have been doing some more prep work in the engine compartment and we're finally getting to the point where we'll be able to set the 409 into place before long. Part of this work involved sanding down and re-painting the upper edges of the front fenders where they drop down into the hood opening area. Back when the 63 was painted in 1999, this area never got stripped of all the previous re-paints so there was quite a bit of paint build-up that was rough and ugly looking. Sanding this area was quite a tedious job since I had to be careful not to damage the paint on the exterior part of the fenders.
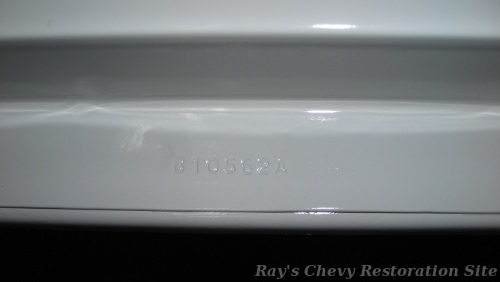
Sanding all the excess paint build-up off the edges of the fenders and re-painting them (blending to the existing paint at the top corner) was well worth the trouble. In addition to improving the appearance, it also revealed some details such as the factory spotweld dimples and the stamped date code shown in the above photo. Both fenders have this same "B10562A" code. I think the letters are plant and shift codes and the numbers are the date (October 5th, 1962).
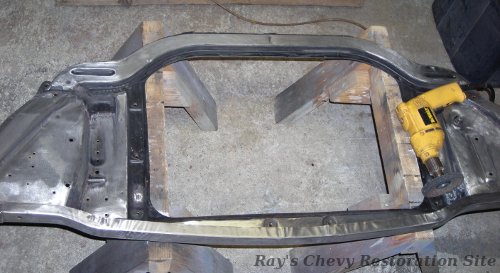
We also pulled the radiator support out and I've been sanding it down in preparation for a fresh coat of semi-gloss black paint. I used a 3M paint/rust remover wheel and some sandpaper to do most of the flat/open areas. I'll wait for a somewhat warm day to take it outside and use the sandblaster to finish getting into all the little hard to reach areas.
February 2012 -- Painted Radiator Support and Finished Engine Compartment
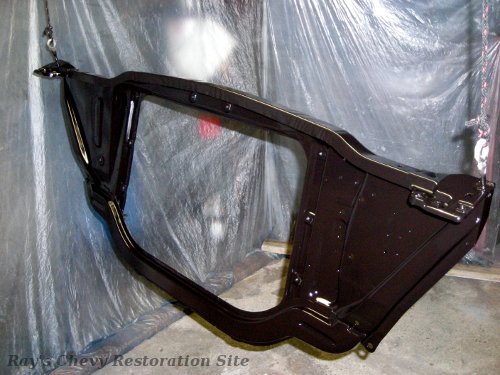
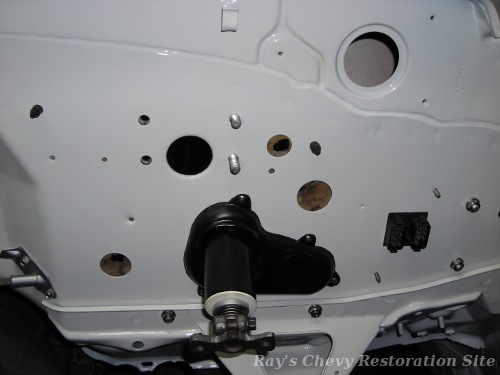
Here's the radiator support after being sandblasted, cleaned, and sprayed with a couple coats of Summit Racing Semi-Gloss Black Chassis Shield Epoxy Paint. I've already sprayed many of the smaller parts (like the grille brackets and heater box) with the Chassis Shield and plan to use it to re-spray the inner fender wells along with the underside of the hood. Summit also offers a satin black version of this paint but I was afraid that might be a little too flat so I chose the semi-gloss. It probably has a little more shine than the factory paint but I think it looks better than being too flat.
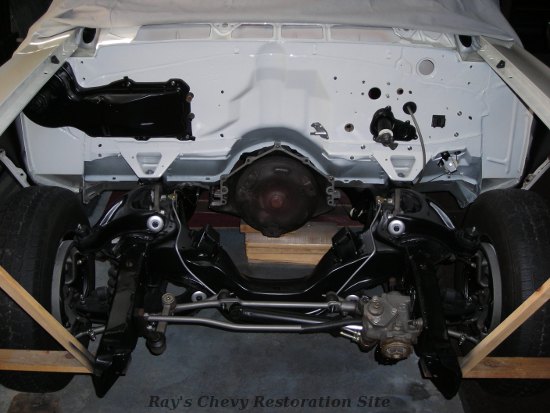
The cleaned and re-painted engine compartment just about ready to set the 409 into place.
- Continue on to Page 6 (February - August 2012 ... 409 Engine Install and Start Up)
- Skip to Page 7 (September 2012 - September 2015 ... More Detailing and Miscellaneous Projects)
- Skip to Page 8 (October 2015 - present ... A Few More Updates)
- Return to Dad's 63 Impala Page
- Return to Ray's Chevy Restoration Site Home Page
- © 1998 - 2023 Raymond McAvoy. All Rights Reserved.