Page 4 of 6 ... August 2004 - March 2017
August 2004 -- A 327 to Replace the 283
We had been searching for a 327 to replace the old 283 that's currently in the truck. However, Dad managed to find a 409 that we'll be rebuilding and eventually swapping into his 63 Impala. Once that's done, the 327 from the Impala will be going into the 66.
May 2008 -- Getting the 327 Ready for the Truck
We pulled the 327 out of the Impala and put it on a spare engine stand. It's a 275HP 327 (suffix code "HCR") originally from a 1966 Chevy car. Dad had it rebuilt before it went into his 63 so our plan is to simply swap on an intake manifold and Rochester 4G carb that we pulled from a 67 pickup 327 several years ago. I believe it's the same setup as was used on the 66 pickup 327's. Then we'll clean and re-paint the engine green. Yes, green. According to my research, factory engine colors for 1966 Chevy 10-30 C/K Series trucks are:
| Engine Size | Color Code |
|---|---|
| 250 L6 | Blue |
| 292 L6 | Green |
| 283 V8 | Gray |
| 327 V8 | Green* |
* These color listings come mostly from page 48 of the 1966 Chevy Truck 10-30 Series Owner's Manual. However, this manual lists the 327 as gray, which according to this thread on 67-72chevytrucks.com is a misprint. Page 6-53 of the 1963 Chevrolet Truck Shop Manual lists the 327 identifying color as green (for medium duty trucks ... the 327 wasn't available in the 10-30 series in 63). There's no mention of any color change in the 1966 Chevrolet Truck Shop Manual Supplement. And finally, I've seen a few factory green (under all the oily dirt) 327's in some local medium duty farm trucks.

Shown here are several of the engine parts that I've already cleaned and painted. The longblock assembly, timing cover, and harmonic damper are still on the to-do list to get painted.
No one markets a green engine paint specifically for this application. I have read about folks using Alpine Green (like used on Detroit Diesel engines) but that is noticeably lighter than I have seen on some original examples. I chose some green paint meant for some Buick engine applications that seems to be a much closer match. I've also read that Dupli-Color DE1617 Ford green is a pretty good match too. And I belive Onan green (like used on their generators) is close too. In fact, I have read discussions on various forums where folks have substituted all 3 of these paints (Buick green, Ford green, and Onan green) for one another and found them to be quite similar.
In addition to the paint color, I have also learned several other facts about how the "High Torque 327" truck engines differ from the passenger car "Turbo Fire 327" engines. The "High Torque 327" engines were first available in 60-series medium duty trucks and S6902 school bus chassis starting in 1962. In 1965, a version of this engine became available in C20 & C30 trucks. Then in 1966 it was available in C10's as well. Most of this information comes from the factory service manuals and the Vehicle Information Kits from the GM Heritage Center.
| 60 series truck "High Torque 327" | 10-30 series truck "High Torque 327" | passenger car "Turbo Fire 327" (*) | |
|---|---|---|---|
| Paint Color | green | green | orange |
| Gross Horsepower | 185 @ 4400 rpm | 220 @ 4400 rpm | 275 @ 4800 rpm |
| Net Horsepower | 158 @ 4000 rpm | 177 @ 4000 rpm | 210 @ 4400 rpm |
| Gross Torque (lb-ft) | 305 @ 2000 rpm | 320 @ 2800 rpm | 355 @ 3200 rpm |
| Net Torque (lb-ft) | 280 @ 2000 rpm | 283 @ 2400 rpm | 310 @ 2800 rpm |
| Bore / Stroke | 4" / 3 ¼" | 4" / 3 ¼" | 4" / 3 ¼" |
| Comp. Ratio | 8.0 : 1 | 8.5 : 1 | 10.25 : 1 |
| Carburetor | 2 barrel (spinner-governor controlled) | Rochester 4G (manual choke) | Rochester Quadrajet, Carter AVS, or Holley (*) |
| Thermostat Bypass | 2 hoses connecting water pump to adapter plate under thermostat | 1 hose connecting water pump to adapter plate under thermostat | Internal passage below water pump lower RH bolt hole |
| Air Cleaner | oil bath | paper element (oil bath may have been optional) | paper element |
| Oil Filter | 1 quart canister (2 quart optional) | 1 quart canister | 1 quart canister |
| (*) Note: There were many different versions of the passenger car "Turbo Fire 327" used over the years. For comparison purposes, I chose to list the 1966 RPO L30 version since that is the one we'll be installing in Dad's truck (and dressing up to look like the factory truck engine). The car engines used a number of different carburetors this year depending on the specific application. | |||
July 2011 -- An Overdrive Transmission
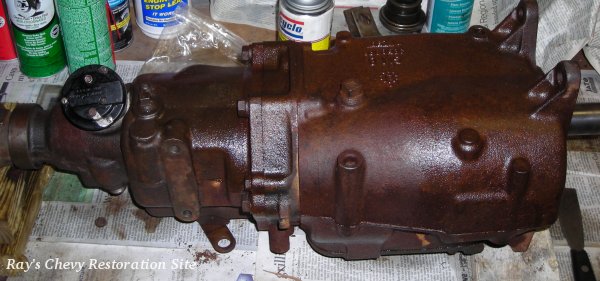
The 327 is still waiting on the engine stand (too many projects and not enough time). Dad recently bought a Saginaw SM-326 3-speed transmission with the Borg Warner overdrive. We bench tested it and found that it works smoothly through all the gears and the OD kicks in when power is applied to the solenoid. We also pulled the side cover and it looks like new inside.
August 2011 -- Cleaned & Painted the OD Trans
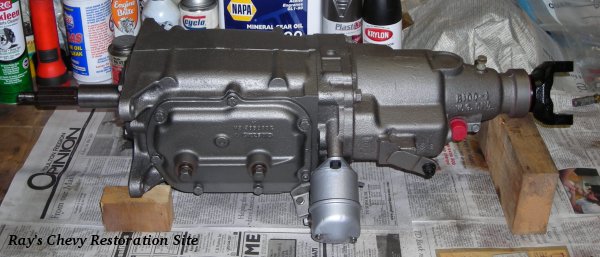
Since this transmission didn't need any internal repairs, we put the side cover back on with a new gasket and replaced the input & output shaft seals. Then I cleaned it up with some brake parts cleaner and used a wire wheel on a drill to remove as much surface rust as possible. Next, I gave it a coat of Rust-Oleum Rusty Metal Primer followed by a couple coats of Plasti-Kote Cast Finish Gray paint. I also disassembled the overdrive solenoid, cleaned it all up, and painted the outside with some silver paint. Finally, we filled the trans with some new SAE 90 GL-1 gear oil so now it's ready to go in the truck.
Summer 2015 -- Painted the 327
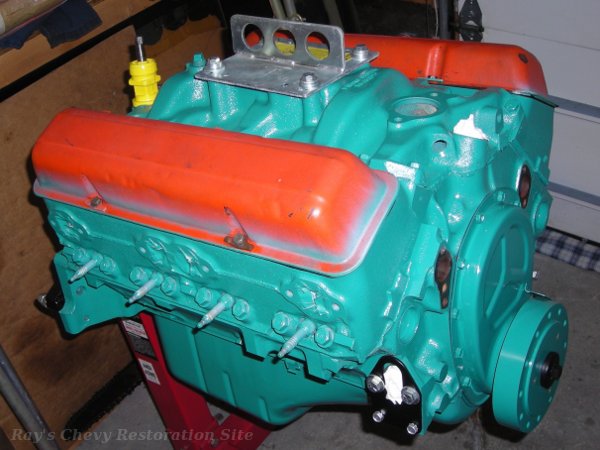
I used a combination of brake parts cleaner and lacquer thinner along with some wire brushes to remove as much of the old orange paint from the 327 as possible. Then I sprayed the engine with a coat of primer followed by the Buick green engine enamel. Next, the oil pan and intake manifold (which I had painted earlier) were bolted into place. The orange valve covers and old painted-over spark plugs were simply used for masking (and left in place for storage to keep out dirt). The yellow thing is a homemade oil pump priming tool made from an old distributor (and is also being used here to keep out dirt during storage).
November 2016 -- Finally Starting on the Swap
After years of planning and collecting parts, we are finally getting around to doing this engine & transmission swap.
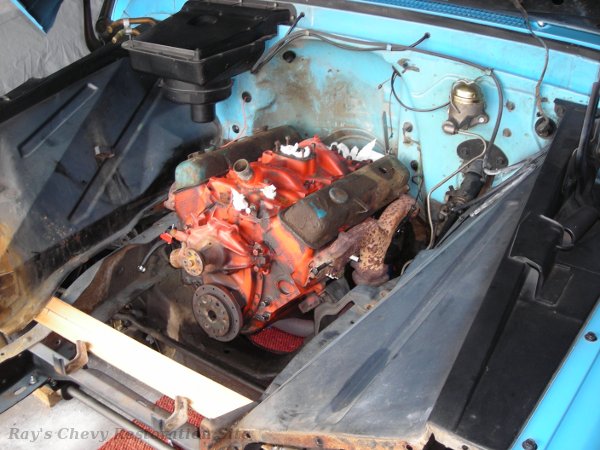
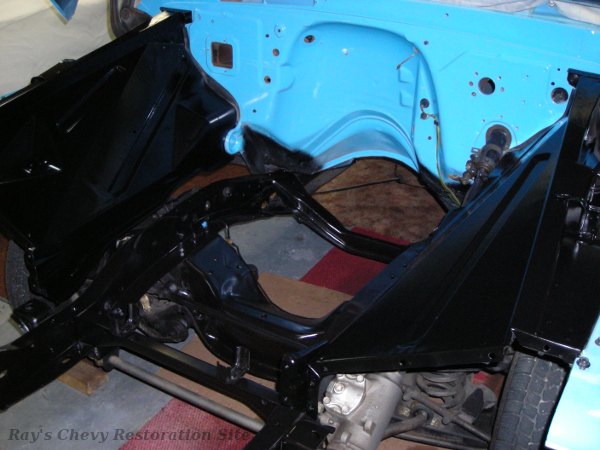
With the truck in the shop, we started by removing the front bumper, grille, grille surround, radiator, radiator support, wiring, and other external engine parts. Yes, it would have been possible to pull the engine without taking out the radiator support & grille, but I plan to strip and repaint the radiator support so having it out will make that job a lot easier. Plus it gives much better access for us to clean up the engine compartment. Ideally, we would have also removed the hood, and front fenders (both inner & outer) but we are running short on storage space so we chose to leave them in place. A couple sticks of wood slid in between the bottom edge of the inner fenders and the frame serve to temporarily support the fenders while the radiator support is out. And an old pair of valve covers were placed on the engine to save the good ones from accidentally getting dented during the removal process.
December 2016 -- Cleaning & Sanding
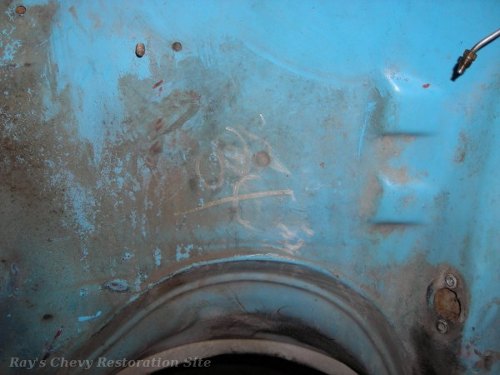
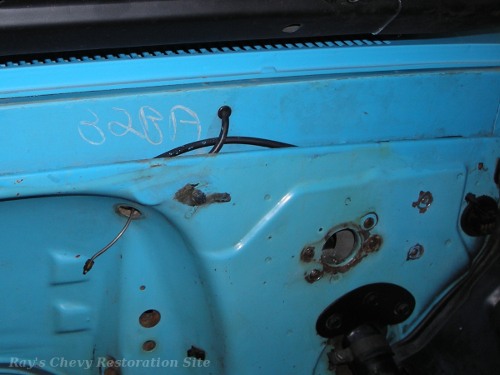
With the old engine & transmission out of the truck, we finished removing some more parts and started cleaning up the engine compartment. In the process we discovered some factory grease pencil markings on the firewall. There was a "34" written in the center behind the engine. I believe that is the body identification code for a fleetside pickup. And after cleaning off some blue overspray from a previous paint job, I also found "32BA" written on the upper portion of the firewall. I believe this corresponds to the RPO (Regular Production Option) code L32 for the 283 V8 engine.
While the original factory paint on the firewall cleaned up fairly good, there were numerous spots that had been chipped or scratched off as well as some damage from an old brake fluid leak surrounding the master cylinder area. So after documenting the factory grease pencil markings, I cleaned those off and gave the whole firewall a light sanding to prep it for a fresh coat of paint.
January 2017 -- Re-Painting the Firewall
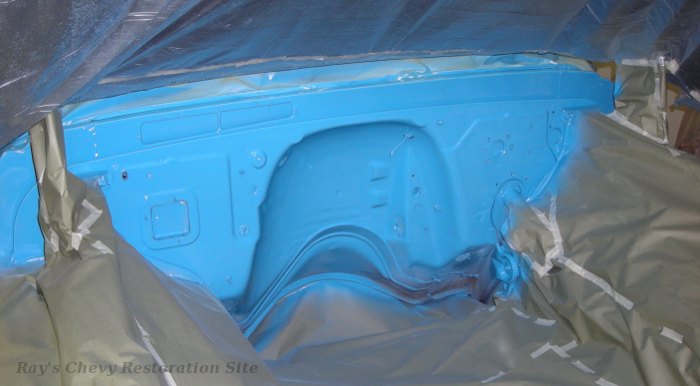
Thanks to a brief period of mild temperatures, I was able to warm the garage up enough to give the firewall a new coat of paint in the original GM #507 light blue. My local paint supplier no longer mixes the Dupont Centari like I used on the rest of the truck back in 1998 so this was done with Nason Ful-Thane 2K urethane.
February 2017 -- Inner Fenders, Frame, and Radiator Support
With the firewall finished, I turned my attention to the inner fenders and front portion of the frame. They received a thorough cleaning and sanding to remove some old paint & surface rust. Temperatures have been a little too cold to paint in the garage, so in the meantime, I carried the radiator support down cellar (where I have a small workshop area) so I can get started on some minor rust repairs.
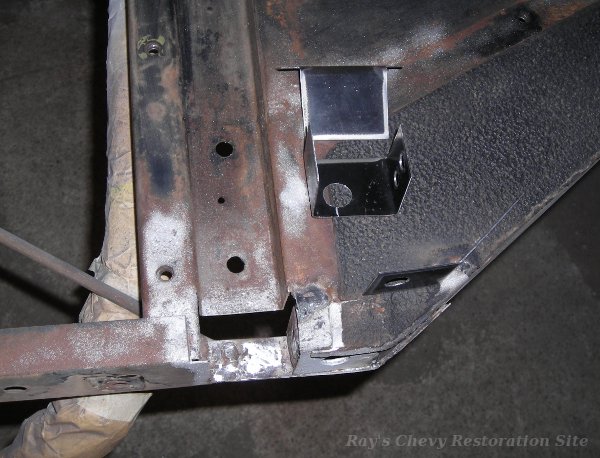
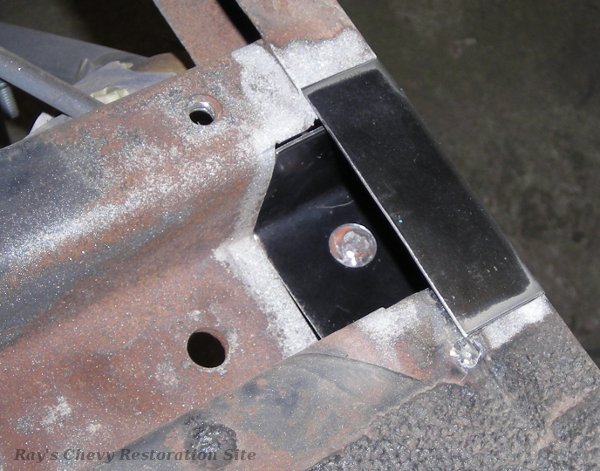
The radiator support had a couple of rust damaged areas at the bottom. Both locations are where the structure forms sort of a pocket at the bottom. I believe those areas probably collected full of mud and dirt that trapped moisture, causing the rust. The two photos above show those areas after cutting out the rust and test fitting some patch panels I made from similar gauge sheet metal. The holes drilled in the patch pieces are for plug welds in areas that originally had spot welds. A couple of the plug weld holes also allow clearance for the backs of the rivets that attach the X-brace in the middle of the radiator opening. I chose to leave those rivets in place and plug weld the patches to the backs of the rivets.
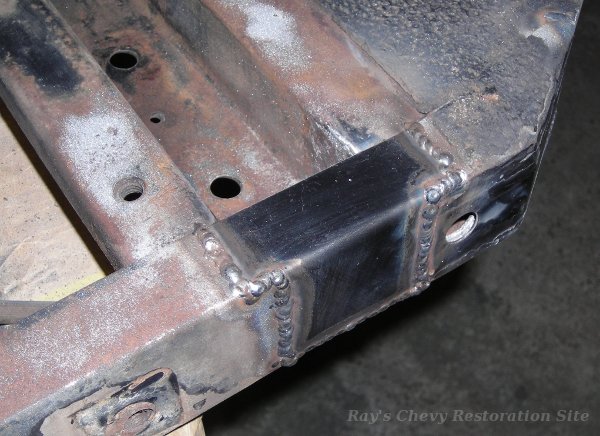
Pictured above is one of the patch pieces welded into place prior to grinding the welds smooth.
March 2017 -- Inner Fenders and Frame Painted
- Continue on to Page 5 (March 2017 - August 2017 ... 327 V8 and 3-Speed Overdrive Swap)
- Skip to Page 6 (September 2017 - present ... A Few More Updates)
- Return to Dad's 66 C10 Truck Page
- Return to Ray's Chevy Restoration Site Home Page
- © 1998 - 2023 Raymond McAvoy. All Rights Reserved.